Sewing is a vast field that allows you to create new products whether they are related to clothing, bags, toys, or household. Sewing can be tricky for some people, especially for beginners but it is not so difficult when you get a hold of it. You can do a lot of stitches for different kinds of seams either by hand or by a sewing machine. One of the most popular and famous seams is a hidden seam. If you are a beginner and do not know how to sew a hidden seam with a sewing machine, you must check out this article.
Are you looking for an easy method to stitch a hidden seam by a sewing machine? If yes, then you’re in the right place. Hidden seams have always been trending. Seams are known to be the most essential part of sewing as seams that have straight stitches and recompenses are an unquestionable requirement for a perfect project.
How to Sew A Hidden Seam with A Sewing Machine?
In order to sew a hidden seam, hold the front sides of the fabric together and sew it with a distance of the seam, but keep it in mind the front sides of the fabric should face each other and you should stitch on the backside. Finish the seam, open the front sides, and here you have got a nice hidden seam.
Sewing a seam is one of the most widely recognized sewing errands you will do. Sewing it straight and even is a component of results that you can be proud of. Before starting off sewing for the project, first, practice it on a scrap and then move on to your final project to avoid any mishaps. Try not to be reluctant to ace utilizing a seam ripper to remove stitches that you are not happy with.
Sewing an ideal hidden seam requires a lot of practice and energy. Once you master it then you’ll be sewing like a pro! The basic condition to sew a hidden seam is to use a coordinating thread (the same color as your fabric).
Don’t worry, if you don’t find the same color thread, it’s okay to use a shade darker as opposed to a lighter one because lighter shades tend to stand out.
Position of the Fabric
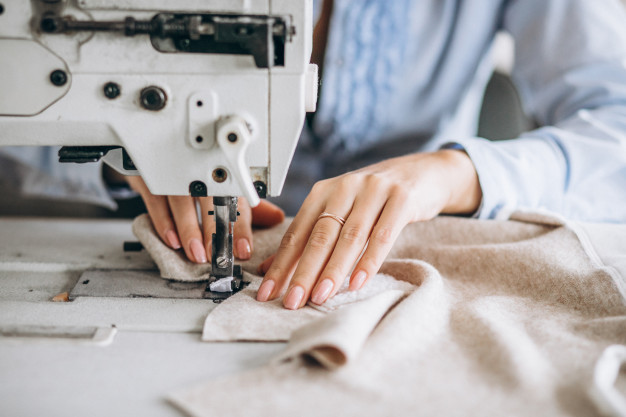
Start with pressing, and then putting both the pieces of your fabric with their front sides together by the end of its edges. So, this implies that the front sides of your fabric will be confronting each other.
Front and Back Side of the Fabric
On the off chance, that you’re sewing a plain fabric and not a printed one then it might be a bit risky to distinguish between the sides, but still, different fabrics have faded colors at the back which makes it obvious that which is the front and which is the backside of fabric. Another way to distinguish between the front and back sides of the fabric is by the weave of the fabric (it is very clear at the sides). Hand bastes the seam; it’ll help you hold the pieces all together in one place.
Adjust the Seam Allowance
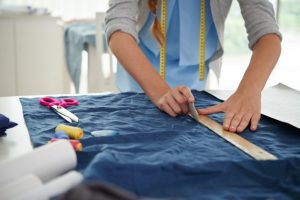
When the fabric is set in place for a stitch, set the seam allowance. Seam allowance is known to be the distance you’ll sew from the edge of your fabric. Universal seam allowances are about half inches (12 mm) or 5/8 inches (15 mm). After adjusting the seam allowance, hold your thread backward so that it doesn’t get caught up in the machine when you start to sew. After a few stitches, you may release the thread.
Apart from this, most of the sewing machines have marked measurements in front of their foot or on their metal plate. If your machine has the markings, consider yourself to be the lucky one, as there is no need to mark the seam allowance then.
Reinforcement Stitch
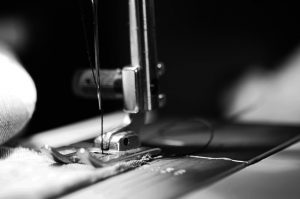
Right after adjusting the seam allowance, set your stitch at a length of 2 for a reinforcement stitch by keeping the thread in your grip. The reinforcement stitch is a back stitch used in the start and end of a seam to prevent the stitches from unwinding. It is near to the edge which basically implies that you take a few stitches in reverse.
Normally, every machine has a button on its front to make it move in reverse. It is pretty simple, just try pressing that button and it’ll stitch in reverse and when you release the button then the machine will sew in the forward direction. Try not to go off the edge; three to four back stitches would be enough to prevent the closures from unwinding.
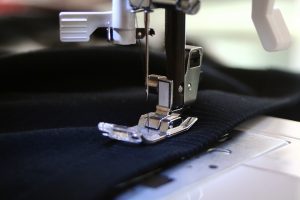
Sew the Seam
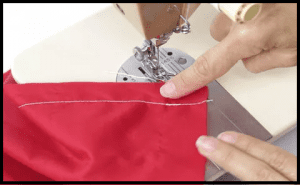
After the above step, quit back stitching (after 3-4 stitches) and slowly try releasing the thread and begin sewing forward in an orderly fashion along the seam allowance line. Utilize the aides in the needle plate to keep overall quite straight.
Finish with Reinforcement Stitch
After you’re completely done sewing, again repeat the backstretch process to ensure the closure from unwinding and ALAS! You’re done stitching a hidden seam.
Remove the Fabric
Remove your fabric from the machine by lifting up the presser foot and the needle. Then pull the fabric that you were sewing and cut off the threads. Your hidden seam is done.
Iron the Seam
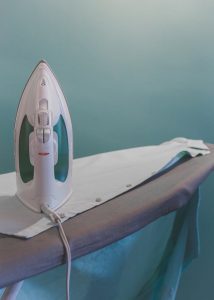
Now, when you’re finally done stitching it. The last step is to iron it. Seam iron is somehow different from the standard ironing procedure. Rather than hauling the iron along the seam, press here and there with medium weight, and then you have a nice decent straight hidden seam in front of you.
It is good to iron the seam after you are done stitching. It will make your seam to be in perfect shape and in the right place for an appealing and nice look.
FINAL VERDICT
Sewing a hidden seam with a sewing machine is really easy if all the steps mentioned above are followed properly. Apart from all this, make sure that you press your fabric nicely before starting off with your project so that you have a good straight guideline to follow. Using the thread same as your fabric would also prove to be favorable. If you don’t find the exact shade, try going for a shade darker because a lighter shade would probably stand out.
Now after reading all the above points your question, ‘how to sew a hidden seam with a sewing machine?’, should be clear to you (if I have taught it right…) and it should seem very simple and easy. With practice, you can even do it without worrying about the seam distance.
It can be somehow tricky about the sides of the fabric that you should hold together or the seam distance in the first try. But trust me, once you get the hang of it, it will be a lot more easier for you.
I hope reading this article was a good learning experience for you and that this article answered your questions regarding the hidden seam. If you still have any questions, you can ask us or watch a video on YouTube to clear your ambiguities. Any feedback would be appreciated!
Happy Sewing! 🙂
Beatrix Ainsley (Bea to her friends) is an abstract artist who was heavily inspired in her twenties by the abstract expressionist movement of the 1940s. Since then Bea has acquired three degrees in Science, Education and most importantly Fine Art. Her art works showcase exploring emotion and introspection of self. To achieve this – the use of bold, sweeping, intricate layers of color, and spontaneity of form is enhanced by reflecting on decades of life experiences. Bea has amassed a vast knowledge of art in all its forms, and hopes to pass it on with her contributions here.